I have been using Heroku for many of my hobby projects and experiments, and everytime I finish my Django application and start to configure it for deploying on Heroku I tend to forget the exact steps. So I thought I should write a post for my future self as well as anyone else who wants to deploy their Django webapp on Heroku platform.
With 512MB RAM, 10K rows of Postgre database, Custom domain support and 1000 dyno hours/month Heroku’s free tier is great for hobby and experimental projects. Follow the steps bellow to configure and deploy your Django app to Heroku.
Signup on Heroku and then install Heroku CLI.
- Add a file named Procfile in project root with following content:
web: gunicorn <django_project_name>.wsgi --log-file -Put your django project name in place of
<django_project_name> - Add a file named runtime.txt in project root with the python version your app uses. Ex:
python-3.7.3Here’s the list of supported runtimes on Heroku: Heroku Python Runtimes.
- Install whitenoise, python-decouple, psycopg2-binary, gunicorn and dj-database-url.
pip install whitenoise pip install python-decouple pip install psycopg2-binary pip install gunicorn pip install dj-database-url - Add whitenoise middleware in settings.py after django SecurityMiddleware.
'whitenoise.middleware.WhiteNoiseMiddleware' - Setup STATIC files details in settings.py
PROJECT_ROOT = os.path.dirname(os.path.abspath(__file__)) STATIC_ROOT = os.path.join(BASE_DIR, 'staticfiles') STATICFILES_DIRS = [ os.path.join(PROJECT_ROOT, '/static/') ] STATIC_URL = '/static/' STATICFILES_STORAGE = 'whitenoise.storage.CompressedManifestStaticFilesStorage' - Add a file named .env in project root and add all security critical settings as environment variables to it. Ex:
 SECRET_KEY=ldoe)s2g_qw*(3^tb-gom9hb*9x8!bye(k6*6#j#m*%9(dz2_r
 DEBUG=True
 USE_SQLITE=True
Now replace those critical values from settings.py with python-decouple.
 from decouple import config

 SECRET_KEY = config('SECRET_KEY')
 DEBUG = config('DEBUG', default=True, cast=bool)
We can use decouple for other values like API keys, Secret keys, Email credentials, etc.
- Configure database in settings.py with dj-database-url:
import dj_database_url DATABASES = { 'default': dj_database_url.config( default=config('DATABASE_URL') ) } if(config('USE_SQLITE', default=True, cast=bool)): DATABASES = { 'default': { 'ENGINE': 'django.db.backends.sqlite3', 'NAME': os.path.join(BASE_DIR, 'db.sqlite3'), } } - Add a file named requirements.txt in project root with all required python modules. Ex:
 dj-database-url==0.5.0
 Django==2.2.1
 gunicorn==19.9.0
 psycopg2-binary==2.8.2
 python-decouple==3.1
 pytz==2019.1
 sqlparse==0.3.0
 whitenoise==4.1.2
If you are using a virtualenv and pip, you can simply run:
pip freeze > requirements.txt - Login to Heroku CLI, create heroku project in project root and add Postgre DB to it.
heroku login
heroku create <your_project_app_name>
heroku addons:create heroku-postgresql:hobby-dev
Update
ALLOWED_HOSTSin settings.py with heroku serving domain or your custom domain. Login to Heroku dashboard, go to your newly created app and access it’s settings to add environment variables.
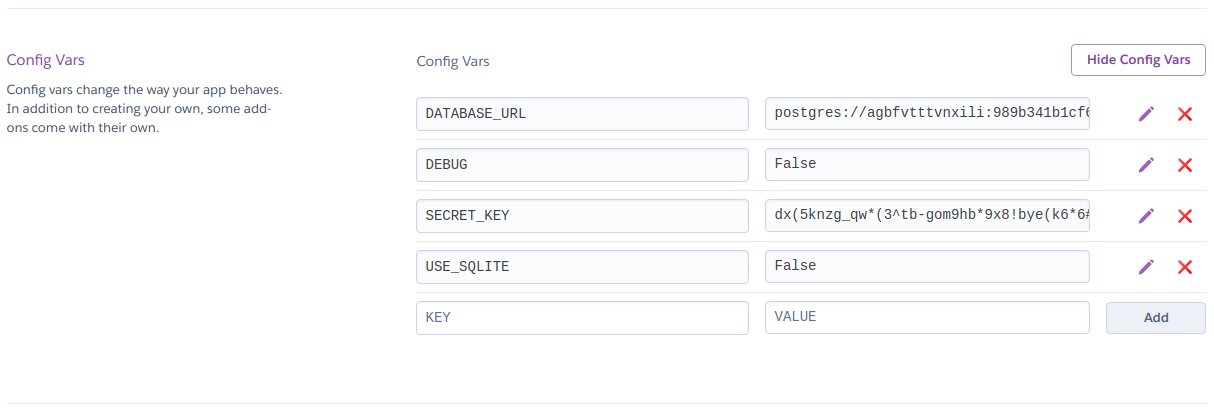
- If not done already, initialize git repo in project root and add the following entries to .gitignore:
db.sqlite3
.env
and commit latest changes to git.
- Push to heroku to deploy the app:
git push heroku master - You can migrate the DB and create superusers with:
heroku run python manage.py migrate heroku run python manage.py createsuperuser - That’s it, you’ve successfully deployed your Django app to Heroku!